Customized Lego UCS Millennium Falcon Coffee Table
My wife bought me the Lego UCS Millennium Falcon (75912) for my last birthday. Its a beast! 7541 parts and an absolute beauty when complete. It took me a few weeks to assemble it. For something this big, I needed a proper place to display it. I've seen it hung on walls, set on shelves and even suspended from ceilings. For me, I feel the only thing that does it justice is its own display table. So I decided to design and build one. I also wanted it to be customized since it was going in the basement where the family spends a lot of time. I wanted to engrave the names of my family on the legs using Galactic Standard or aurebesh.
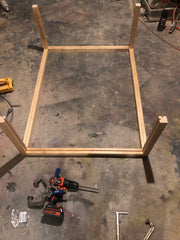
I'm not a furniture maker so I wanted something relatively simple. For people like me who don't regularly build furniture pocket joinery is a godsend. The strength and simplicity of the construction leaves room for a lot of creativity. The table needed to have interior dimensions of 40"x30"x16". I decided to use pin 2" square boards to make the frame and clear acrylic. I know many will say glass is the way to go. Yes, glass holds up better over time but the cost difference with acrylic can't be ignored. Plus, this was my first go at a table so I wanted to keep the cost down.
The basic design is a frame using the pine boards. The pine boards have a 1/4" slot routed in the center to hold the acrylic sheets. The top is essentially a frame with 45 degree miter cuts and a 1/4" slot to hold the acrylic sheet.
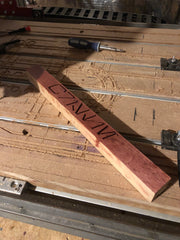
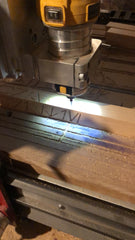
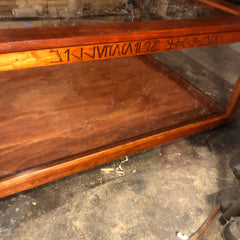
First I cut the boards to length. Then I routed the slots in each. The four vertical boards for the corners need slots on two sides. Then I had to setup the CNC machine to engrave the names of my family on each of the legs. I downloaded an aurebesh font and used it to make vectors of their names. I also made a vector for Millennium Falcon for the side of the table. I used Vectric Aspire to generate the V-carve g code. I used some left over wood from the pine boards to test the engrave and make sure the setting were right. I didn't want to ruin the boards after cutting and routing them.
 .
.  .
. 
The engraving came out great. Next up was the pocket holes. I used a Kreg pocket hole jig. Drilling the holes was pretty straight forward. I did learn that it essential to clamp the pieces when assembling. The Kreg right angle clamp helps a lot when assembling. I also learned adding glue helps a lot with the assembly. Just be careful with the glue or you will have a lot of post assembly sanding like I did. I left the top pieces of the frame off to allow me to insert the acrylic sheets.
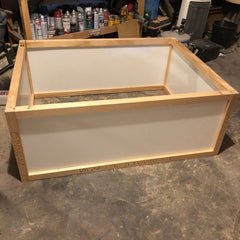
The acrylic sheet were cut from a 4'x8' 1/4" sheet down to manageable sizes but I had to make the final cuts on my table saw. Once I had them cut out I inserted them in the table frame. Then bolted on the top pieces of the table. Glue, clamp and screw together.
I debated staining the wood pre vs post assembly. In hind sight I think staining the wood before assemble may have been easier. I left the covering on the acrylic because I knew I would be staining the wood and I wanted to keep the stain off the acrylic. This mostly worked but some did still get on the acrylic. I had to apply a good bit of stain into the v-carved names to cover the wood.
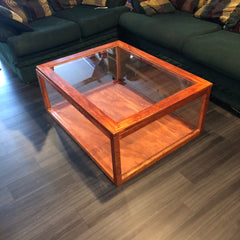
The top cover was cut from 3/4" pin sheet. I cut 2" wide boards and routed them in the middle with the 1/4" slot. I then cut the 45 degree miters and and assembled with glue and staples. The final bolting and gluing with the acrylic mounted took a couple of tries. I probably should have give myself a little wiggle room in the dimensions to make the assembly easier.
Finally the table was assembled. I was super pleased. I'll show the final product but I'll cover the Falcon's base and lighting in a separate blog post.
 .
.  .
. 


I know it’s been a few years, but I want to make this for my Falcon. The units weee confusing to me for the 5 pine boards. Is it 6 feet by 2 feet by 2 feet?
How did you build the actual landing pad? I’m thinking of building one for my Mandalorian Razor Crest.
Where did you purchase the acrylic for the display? It looks amazing and I would love to make this for my son and his lego set. TIA
I love the look of this table and am looking to build one out myself using your layout. I have a question though, what did you use for the bottom? It looks like it might be some of the same pine sheet you mention was used for the top but I was wondering what the dimensions of that would be if that was the case. Excellent work.
Awesome table! what materials did you use for the landing pad inside the table? My brother just asked me to craft him a landing pad for his lego falcon so it wont scratch up the table. Finally came across your blog which gives me hope i can make something
Leave a comment