

Han Solo -My First Cosplay
Posted by Chris Carpenter on
If you read anything on my blog it should be obvious I love Star Wars. More specifically, I love the Millennium Falcon and its scruffy pilot Han Solo. I've wanted to have a Han Solo outfit since I was a little kid. I recently made a DL-44 blaster and that got me thinking, why not a Solo outfit. When my son reminded me Blerdcon was in a couple of weeks that's all the motivation I needed. I mean, how hard can it be to make a costume??? Yeah....
So, this blog post is going to be less of a how to and more of lessons learned/don't do this. Most of the pictures are of the finished costume. I was in hurry when I put it together because it had to be done before a trip we were taking before the con.
Like I said, when I started I knew I had a working blaster. You can see the DL-44 build here. That was a journey as well but it has working lights and sounds via a custom programmed Proffieboard. That left me to make the pants, shirt, vest, gun belt and boots. First thing I did, was Google around DIY Han Solo costume. Lots to see there. Tutorials on belts, pants, shirts from easy to complex. Being lazy I figured, I'll just buy this stuff. Off to Amazon I go and I end up with something around $250 for a costume that wouldn't really look that good. Back to DIY.
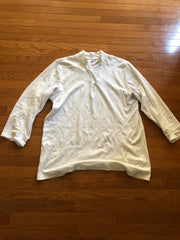
Most of the tutorials I found center around taking existing shirts and pants and making them look like Han Solo's. Off to scour the thrift stores I went. Some time in 2nd Avenue scored me a blue pair of mens slacks and a white half turtleneck shirt (I'm not very fashionable so if slaughter the names of clothes, have patience). I hit another 2nd Avenue and scored some rubber boots that I thought looked good enough to pass as riding boots.

For the belt I saw a blog where a lady used old leather handbags to make it. I hit up GoodWill and found lots of bags. Yay! No, not really. The lady online clearly was more skilled with leather than me but I'll come back to that.
The shirt was pretty straight forward. Cut a V in the front. Cut off the end of the sleeves and hem up the edges. Now I use the term hem, like I can sew. I haven't sewn anything with a machine since Home Ec in high school. Even then I only managed to sew a cover for my boomerang...long story. So, I consulted my in house fashion advisor, (my wife who was invaluable in putting this together) and realized I could use fabric glue or iron on adhesive. I went for iron on adhesive because I it seemed quick and I didn't have to wait for it to set. It is quick but I learned if you don't iron it just right it doesn't hold any wear near as well as fabric glue. Even when done right its still not as strong. Something to keep in mind.
Next I needed the pants. The pants were fine as is except they needed the Corellian blood stripe. After reading a few tutorials I decided to use some thick ribbon for this. I got some blue as close to the pants as I could and red. The red would be cut into stripes and glued onto the blue. Then the blue would be glued onto the pants. I have a laser cutter so I setup a pattern to cut the red stripes. This actually worked really well and I made enough red stripes for both sides in just a few minutes. Then I had to attach them to the blue ribbon. I used one of the red strips as a spacer and started the tedious process of gluing them to the blue. Took about an hour but came out pretty good. I had thought about sewing the blue stripe onto the pants but my fashion advisor suggested using fabric glue.
I used the iron on strips to attach the stripes to the pants, which seemed to work well at first. Then I learned that iron on tape doesn't hold up as well in areas with a lot of pressure of movement. Eventually, I ended up gluing most of the stripes on.
 .
. 

Then we come to the vest. I thought about just using a black dress shirt and cut off the sleeves. It just didn't look right. So I went to JoAnns and asked for some heavy black material. The conversation with the lady cutting the fabric was hilarious as I tried to explain what I was doing to see how much fabric I needed. We started at a yard and as she realized I was clueless she kept suggesting more material.
I found some really cool templates for the vest online. Problem is, I don't think they were envisioning a 6' 2", 230...ish lb Han Solo. So I started with those ideas as a template cut some fabric and realized I'm to big for the pattern. Then I started Googling how to measure yourself for a vest. Helpful and confusing all at the same time. I got some general measurements and instead of cutting fabric I cut some paper patter to see if it matched up. I did this try and error a few times until I got something that seemed right. I had originally planed to laser cut the vest fabric but by the time I got the dimensions close it was too big for my machine.
 .
. 
My plan had been to cut the pattern, pin it and have my wife/fashion advisor sew together. She did a great job on her part and if you look closely at the vest you will see some really nice stitching. Then you will see some other parts and think a child did it. I tried to sew it myself and she had to come behind me and correct. Then there was adjusting the neck line which she again suggested be done with glue. Being stubborn and stupid, I tried to sew it. It didn't work. She then had to take out the seam I had sewn and suggest again, that I glue it. Finally seeing the wisdom of the advice I complied and made a reasonable neck line.
Making the pockets was a mess. One of the tutorials I watched showed a lady cut pockets a little big, fold them and glue them on to make actual pockets. Bah! I don't need those extra steps. I'll just glue squares on and have pockets. So, I learned the thing about pockets is, they are supposed to be pockets. Not just a piece of fabric glued onto another pice of fabric. Again, my wife had suggested this and again I didn't listen. You can insert your favorite cliche about men and instructions right here.
Finally, I took my wife's advice on the pockets and uses the laser cutter to cut some fabric I could make into pockets. This went well but I once again tried the iron on adhesive to hold them. Worked at first but once again had to be replaced with fabric glue. Just use the fabric glue.


After the vest was done came the belt. Lots of reference material on the belt online. I quickly realized using the purses wasn't going to work. None of the tutorials address thickness of leather. The purses were just too thin. Eventually, I ordered some leather sheets from Amazon. I only had so much and I wanted to be very sure it would work. I used poster board in the laser cutter to make patterns until I got the shape right. Finally, I cut the leather for the three main parts. Belt, holster and the triangle that attaches the two. My testing paid off. The holster fit the gun great and the videos I watched had said to mold the leather around the gun BEFORE sewing the holster together. I had made it big so I had room to work. Then I had to sew it.

In my head, I had envisioned a quick run with a sewing machine for perfectly beautiful stitching. No way, no how with the leather I was using. Michaels has a leather hand sewing tool for $20. Harbor Freight has one for $5. Turns out they are the same device in different packaging! Get the Harbor Freight one! I then got to hand sew my holster together. Challenging but fun. My stitching isn't winning any awards but its serviceable.
 .
. 
The boots were pretty straight forward. Mine were actually steel toed and had yellow paint over the toes. I covered this with Satin black paint and then black shoe polish after it dried. I buffed the boots to a decent shine, invoking memories of shining boots when I used to be in the military. This part went really well.

The best video I had watched showed the author making the buckles from metal. I really thought about doing that and should have. Instead, I found a design on Thingiverse that seemed like it would work. Really nice design. Again, 6' 2" 230 ish pound just probably was not the target model. The clips worked but the plastic wasn't strong enough to hold. Running out of time, I decided to reinforce it with JB Weld. This worked but I'm going to have to redo the buckles in metal eventually.
I bought some thin aluminum and tin snips. I cut the aluminum to buckle shape and used to cover the 3d printed plastic for a metal look. This actually worked pretty well and made the buckles presentable.
My wife tried to sew some trim stitching on the belt but her machine just wasn't up to it. I scrapped that idea and just went to assemble everything. Probably the hardest part was getting a correctly scaled leather pattern for the belt greeblies. I had resin printed them and they looked good. Took me a while of trial and error again with poster board for a good fit. Eventually, I got there and again used the laser cutter to cut the pouches with holes for sewing. More, slow clumsy hand sewing and I had pouches on the belt.
Lastly, I had to assemble the belt. I bought some bags of snaps from Michales. They worked pretty well. My biggest struggle was sizing the belt. I had redesigned the Thingiverse clips sow the. rear half of the belt slid through clips and held in place with velcro. Allowing me to adjust the fit. Sounded great but in practice it was still hard to get the thing lined up. Finally, I got it the belt assembled and put it on the for the first time. Ear to ear grin. Not perfect but really cool.
 .
. 
The first time I put the whole thing on, I was super pumped. The first day we went to Blerdcon it worked out fairly well. But I noticed the ironed pieces were not holding very well. So that night I liberally applied fabric glue to anything that seemed not secure or was flapping. Again, the fabric glue works well. My big problem came then next day with the belt. One of the buckle pieces broke and the belt just fell off. Sent me scrambling for super glue. I got some from CVS and laid it on thick! That seemed to hold it for the rest of the conference. Again, I'm going to redo those buckles in metal.
 .
. 
Here are some pics of me in the costume courtesy of Jen Eyre photography.
 .
. 
So, for my first experience it was pretty educational. Not as easy as it looks. So I hope this helps somebody out whose thinking about making a Han Solo costume!
Share this post
- 0 comment
- Tags: blaster, Blerdcon, blood strip, boots, Corellian, cosplay, costume, DL-44, han solo, Millennium Falcon, pants, Proffieboard, sewing, Star Wars, vest